Solar power on a boat: easy, right?
So you found this page because,
1 – you are starting your journey into installing solar on your boat or,
2 – you installed your solar, and now you realise that there are better sources than eBay for quality components that last.
So let’s chat about solar, the pitfalls, common mistakes, good practice and quality gear.
What do you need?
To purchase the correct solar equipment, you must know what equipment you are running on your boat. This simple but crucial step can easily be overlooked because finding out what you need takes some work. In essence, you need to determine your boat’s power consumption.
You’ll need to do this first to determine the number and size of solar panels you need and the size of your battery bank. So, how do you measure how power-hungry your boat is?
Simple: all equipment on your boat is rated in terms of power consumption expressed in Watts. Consider your regular household 25W lightbulb or your 2,000W (2KW) toaster.
Please look at the main electricity chompers on your boat, like your fridges or freezers, lighting, instruments, WIFI router, TV, etc… Give this serious attention to ensure you do not underpower your boat or overwhelm your wallet. In the end, you end up with a specific number of Watts.
Naturally, you do not run your lights during the day; your TV may only be on for 4 hours per night, and your fan may only run in your cabin for 8 hours. So, when you identify your appliances and equipment in terms of wattage, you also need to know how many hours your equipment is on each day. You can do this in a simple spreadsheet to determine the total watts used in 24 hours expressed in watt-hours (Wh).
equipment
Navigation
wattage
30
hours per day
12
watt-hours
15
Lights
100
4
25
TV
200
5
40
So there you have it: your watts and your watt-hours in a nutshell. However, two more main players are involved in determining your solar system.
The voltage on boats is usually 12 or 24 volts, but this can vary. The last player is Amps, which only appears if your batteries run your equipment. Let’s look at these two other players, their relationship with Watts, and what they do.
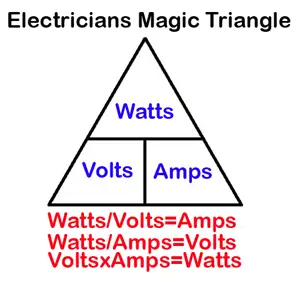
Here are the 3 players:
The simplicity of the mathematics is quite beautiful… Meet Watt, Volt and Amp. If you know two, you know the third.
Why is this important? It would be best to have all these to calculate your power consumption and the subsequent solar system you must design for your boat. Do you need clarification about electrical stuff? Look at it from a different perspective and use water as an analogy…
Imagine electricity as water flowing through a hose. Disclaimer: Never mix your analogies, as water and electricity don’t go together well. In any case, I digress.
Here, we have watts, volts, and amps. Look at the voltage as the water pressure. Although no water is flowing, the pressure is there, and it becomes clear when you turn on the tap.
Amps, on the other hand, are the gallons of water flowing through your hose. Depending on what happens at the end of the hose, it can be a lot or a little.
Watts can be compared with the power the water produces at the end of your hose against the old water wheel. But for our purposes…
- Amp – an ampere is the unit used to measure electricity flow.
- Volt – the basic unit of electromotive force, often called potential difference, causes a current to flow.
- Watt – the basic electric, mechanical, or thermal power unit, equal to one volt-ampere.
So, let’s combine this in some calculations. Looking at the triangle above, you can simply substitute your known factors to find the missing one. For example, if your battery is 12V and your fridge is 5A, you simply multiply 12 x 5 to get 60W. Conversely, if your 12V spotlight reads 150W, you simply divide 150 / 12 to get 12.5A.
Okay, so what about Ah?
An ampere-hour (abbreviated amp hour, or mostly just Ah) is the energy charge in a battery that allows one ampere of current to flow for one hour. So, what does this mean?
For example, a 5-watt light running on a 12-volt battery will use 5W / 12V = 0.4167A. Therefore, a 120Ah (amp-hour) battery will last 288 hours until the light goes out (120Ah/0.4167A = 288 hours).
Other factors reduce this duration, but we will shelve them for now. Later, we will introduce the proverbial “fudge factor” to account for these discrepancies and others.
Let's have a look at your boat...
A 40-foot yacht may consume about 120 amp-hours every 24 hours when not connected to shore power. So is a 120Ah battery all you need? No: if you design your battery bank from scratch, it is always a good idea to at least double your usage. This would make your bank a total of 240Ah. But wait, there is more… You should also add a 25% fudge factor to account for battery deterioration and other factors that reduce capacity. In this case, we add another 60Ah to the bank, which makes your total battery bank 300Ah.
Naturally, you may use much more energy than 120Ah. Your habits, boat, battery bank size, and equipment all play a role in determining this educated guess. But for a prudent energy consumer, 120Ah will just be enough. I.e., look at it as a starting point.
Okay, stuff this adding up of watts. Is there an alternative?
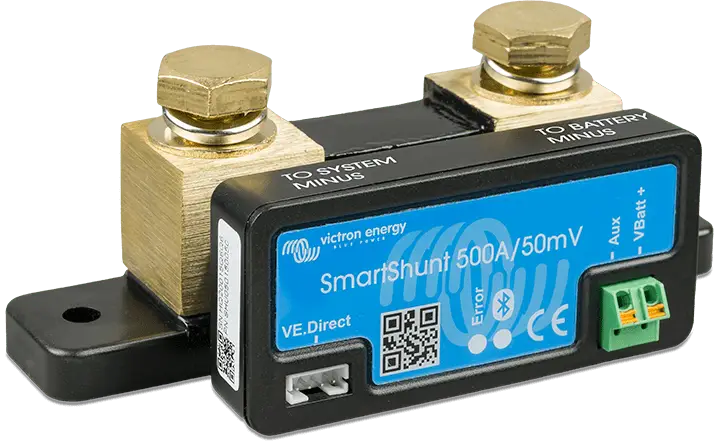
Mais oui! You can use a shortcut if you are already fully set up with a battery bank. Get shunted… I.e., install a suitable shunt. You know- shunt it. What is it? Simply a low resistance path through which ALL your amps flow. An amp meter if you like for your total system. With it, you can measure your amp usage over time, particularly when using the VictronSmart Shunt. This sexy beast measures what and when you use it and sends this data to your smart devices, such as your tablet or phone. It records and stores historical data, so you do not have to add up your equipment’s wattage after all…
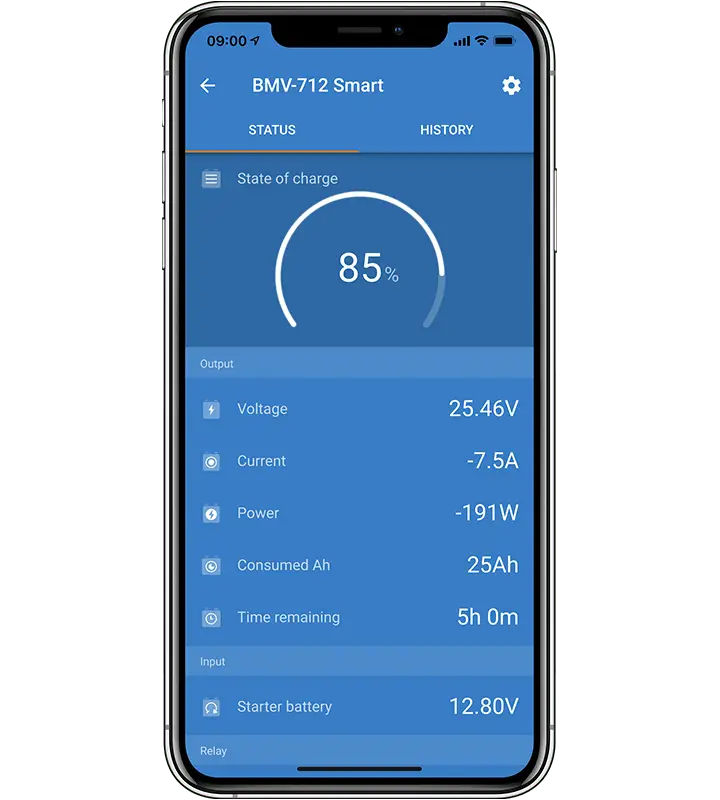
The Victron App
If you choose Victron equipment, you will use the Victron App (VictronConnect). Through an intuitive and clean interface, you can access real-time and historical data for any Victron product via Bluetooth, including your shunt and solar controllers. VictronConnect works on your iOS and Android phone, as well as on your laptop on Windows and Mac.
VictronConnect is the perfect tool for monitoring your power, solar, and helping you configure your system initially.
Okay, now you know what power you are using and a bit more about your battery bank. Next to consider are your solar panels.
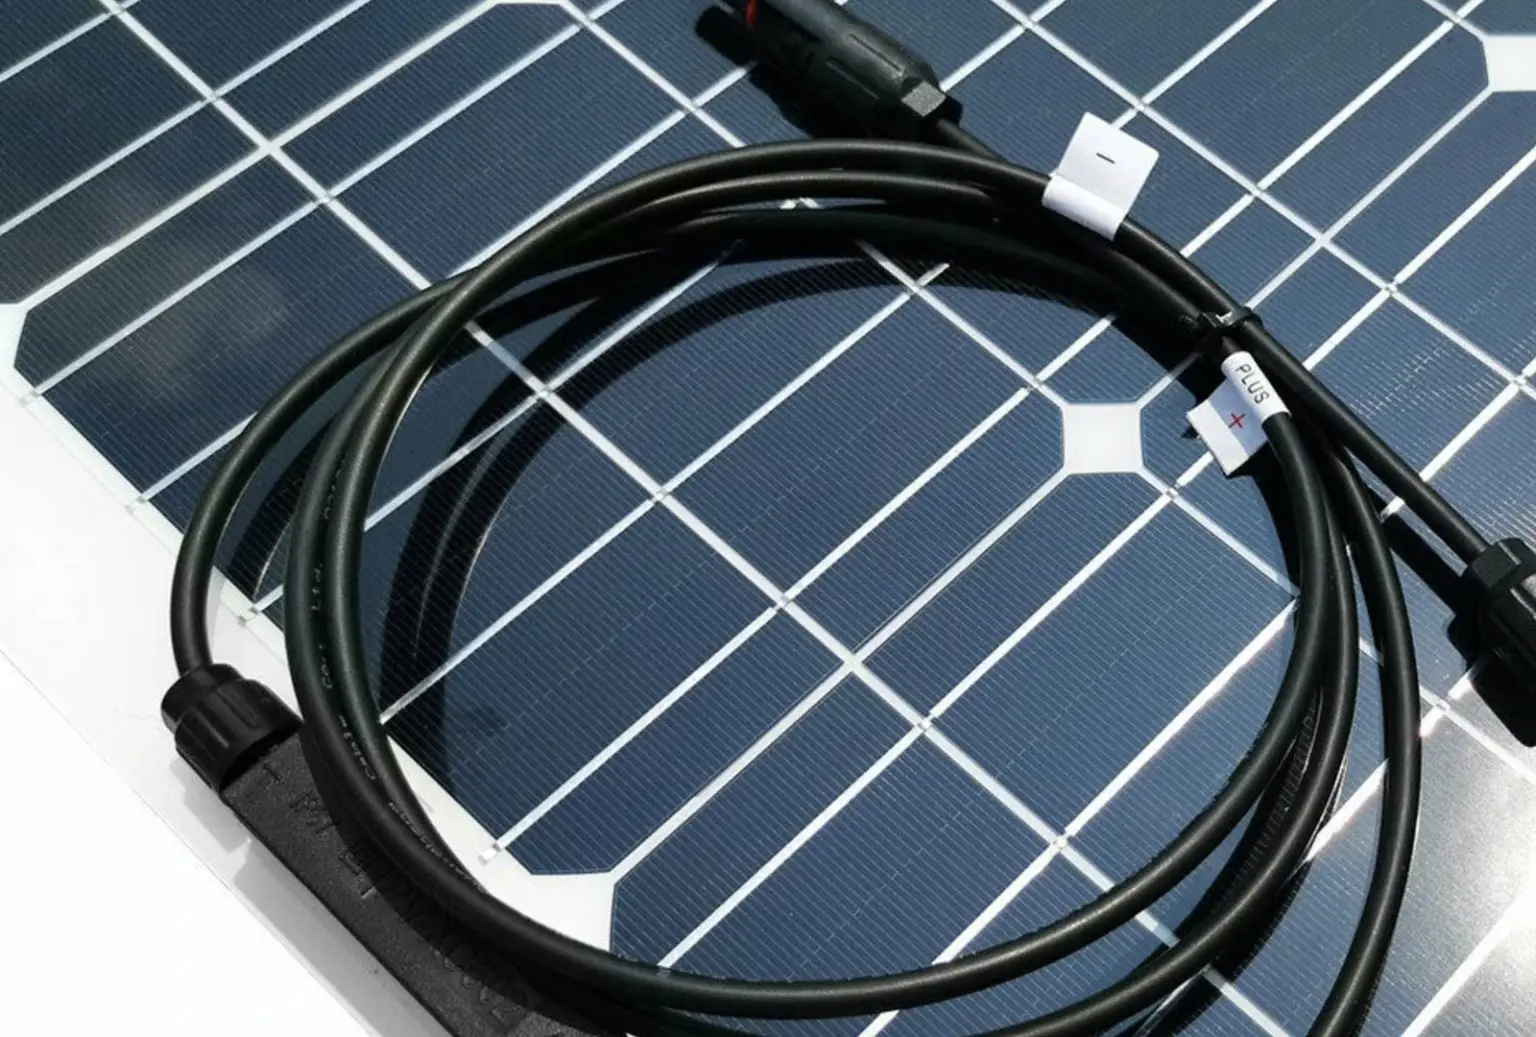
How many watts of solar do I need to maintain my battery bank?
The short answer is simple: as many as you can fit on your boat. However, I can see you twitch, as this will neither look good for the boat nor the wallet. So, let’s look at this with some example calculations based on our 40-foot boat with a 300Ah battery bank.
Solar Panel ratings are commonly stated in watts, for example, 200W. To calculate the energy the solar panel can supply the battery with, we divide the 200W by the solar panel’s voltage. For example, 200W / 18V = 11.1A (remember our previous triangle).
It’s important to note that solar panels are often advertised as 12 volts, a common misconception. The voltage is derived from the panel’s spec sheet and is usually denoted as ‘Max Power Voltage.’ The 12-volt label means they can be used in a 12-volt system with the appropriate solar controller.
So how many watts do I need?
Again, you can not have enough panels. Just think about cloudy days, mist, hazy/foggy periods, or any other external issues you may encounter. Also, think about the timing in which your batteries are recharged: the more wattage, the quicker the charge. Any excess wattage can be used to run your ice block machine, your hot water system, or any other extravagant power-consuming gadget you may deploy on your vessel.
But, really, how many panels do you need for your 300Ah battery bank with a 120Ah daily consumption?
Many factors determine this. As a rule of thumb, you can double your battery bank Ah, giving you a minimum of 600 watts. In most cases, this will maintain your batteries with modest power use.
Breaking this down to rough calculations, our 120Ah consumption x 12-volt system = 1,440Wh. But as you know, the stated performance in the panel’s spec sheet is seldom achieved due to dozens of external factors and/or plain misrepresentations from some foreign manufacturers (let’s not name any specific countries). So your 200-watt solar panel may only produce 150 watts because the sun is not at right angles, there is a little dust in the air or on your panels, and the odd cloud is drifting past.
To keep your batteries charged, 1,440Wh divided by 150W = 9.6 hours of sun. However, there may only be 2.5 hours of sun per day, so we can calculate back and say we need 1440Wh / 2.5 = 576 watts. In our scenario, with a 300Ah battery bank and a 120Ah daily consumption, we may be looking at 4 x 200W solar panels, giving us 600 (actual) watts.
Polycrystalline vs Monocrystalline solar panels
So let’s complicate things a little. Solar panels aren’t solar panels. There are 3 main types. Monocrystalline solar panels are more modern, better, and a little more expensive than polycrystalline solar panels. Go with a reputable brand, otherwise, you may find that the closest your panel came to being monocrystalline is the sticker that says: “Monocrystalline solar panel”. There are also thin-film solar panels that may suit your circumstances. These are often flexible and can be shaped on top of your bimini. However, they do not last as long. Flexible solar panels will still require a solid backing. They can not just lay on top of your bimini as they will deteriorate at a rapid rate that way.
Grading solar panel
Naturally, that is not the last of it. Solar panels are also rated in terms of their quality.
“A” Grade solar cells are prime flawless solar cells. Again, look for a good brand otherwise your A-Grade consists of just a sticker saying “A-Grade”.
“B” Grade solar cells are solar cells that contain a visual flaw that does not affect the power, their price is a little lower than A Grade cells.
“C” Grade solar cells are those with a flaw that affects the power output, so the output power is somehow lower than A and B grade cells, and the price is subsequently a little lower.
Then there is efficiency...
Efficiency in terms of solar panels measures the amount of solar energy that falls on a solar panel’s surface and is subsequently made into electricity. Due to the latest advancement in solar cell technology, the average panel conversion efficiency has increased from 15% to 20%. This substantial jump in efficiency resulted in an average size panel’s output jumping from 250W to 340W. So, same size, more power. Or, more importantly, for us yachties. It has the same power but in a smaller size.
So, if you buy a cheap panel, you may see an efficiency rating of “more than 17%,” which could be a blatant porky. Conversely, on a better quality solar panel, you may find something like “20%—22%.”
Let's talk about controllers
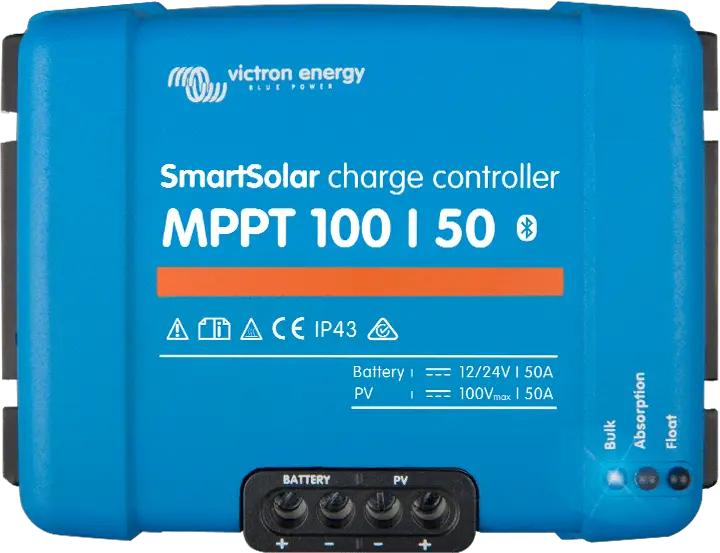
Controllers come in many different configurations. The most important distinction is the difference between PWM and MPPT controllers.
In essence, and oversimplified, the difference between the two is this:
Pulse Width Modulation
A PWM controller draws the current out of the solar panel at just above the battery voltage.
Maximum Power Point Tracking
With an MPPT controller, the current is drawn out of the solar panel at its “maximum power voltage.”
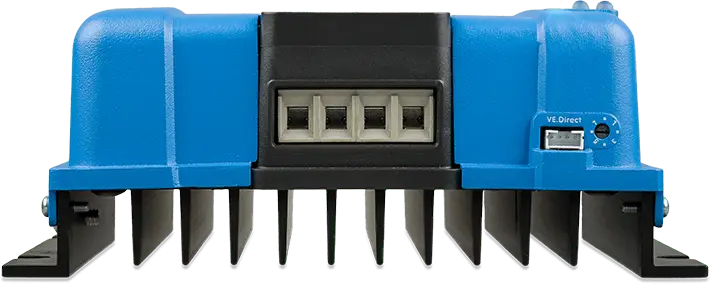
Therefore an MPPT controller is better but also a fair bit more expensive. Be aware of eBay offers where MPPT is no more than a 2-cent sticker on a PWM controller. Again, I will not mention any specific countries of origin here… Moreover, solar controllers are rated for both voltage and amperage…
For example, the above Victron 100 | 50 is rated to 100 volts and 50 amps. The new Victron regulators are also smart in that they have Bluetooth and can be connected to communicate with each other to minimise competition for the batteries’ attention and for remote monitoring. Coupled with the Victron SmartShunt, you will have a good idea about your power in, your power out, the state of your batteries and all kinds of helpful information that will make your life easier and extend the life of your battery bank.
Using multiple solar controllers
It is not uncommon to see multiple solar controllers feeding into a single battery bank. There can be several reasons, but the main reasons are:
- The solar panels have different voltages. It is NOT recommended to connect solar panels with different voltage outputs. This may damage the controller.
- The cost of larger capacity solar controllers goes up exponentially. It may be more cost-effective to use several smaller controllers to get to your required amperage.
- Redundancy is also one of the reasons you may install multiple solar controllers. If one array goes down, you still have the other.
Connecting in parallel or series?
PARALLEL – pros and cons?
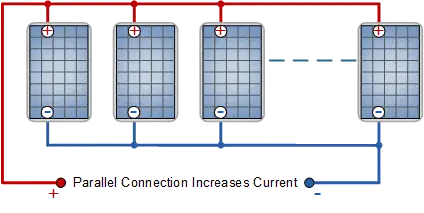
Exclusively wiring your panels in parallel is used for smaller, more simplistic systems, and is often used with PWM controllers.
When applying the maths in the triangle above, you can see that connecting your panels in parallel increases the amps and keeps the voltage the same.
The problem with parallel systems is amperage. Lots of Amps need a thick, high-gauge wire. Consequently, “transporting” high Amps also becomes problematic if your panels are more than 3 to 4 meters from your controller.
Look at your controller and ensure your connectors can take the heavy gauged wire required.
Series – pros and cons?
Exclusively (as in without combining series and parallel) connecting your solar panels in series also suits smaller setups, specifically where an MPPT controller is used.
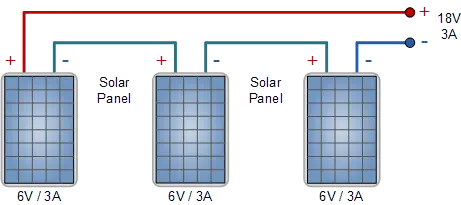
As opposed to parallel, a series connection increases voltage and leaves the amperage the same.
High voltage lends itself better to be “transported” over long distances. Consequently, your wires can be of a much smaller gauge which on a yacht can make all the difference.
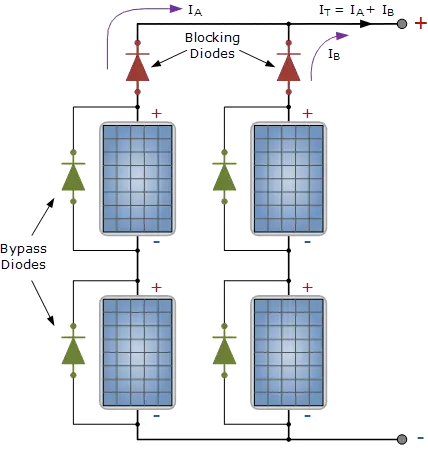
Shading problems can occur with older systems when panels are wired in series. It is like the old Christmas tree lights: when one fails, all the lights go off. Parallel connections are not affected by this. Saying this, newer panels may have bypass diodes. This simply means that when one panel is “blocked”, perhaps due to shading, the current can flow parallel to (bypass) the panel, so the flow is not blocked.
Wiring up your solar controller
From panels to the controller
The wiring from the panels is relatively simple. Use the appropriate gauge wire and simply feed these into the controller using the correct polarity. Most controllers have these inputs clearly marked. Consider if you run multiple panels in series or parallel. In series (positive of one to the negative of the next), your voltage increases and amps stay the same. Meanwhile, the voltage stays the same in parallel, and the amps increase.
So, your controller must be configured to fit your wiring choice.
From your controller to the batteries
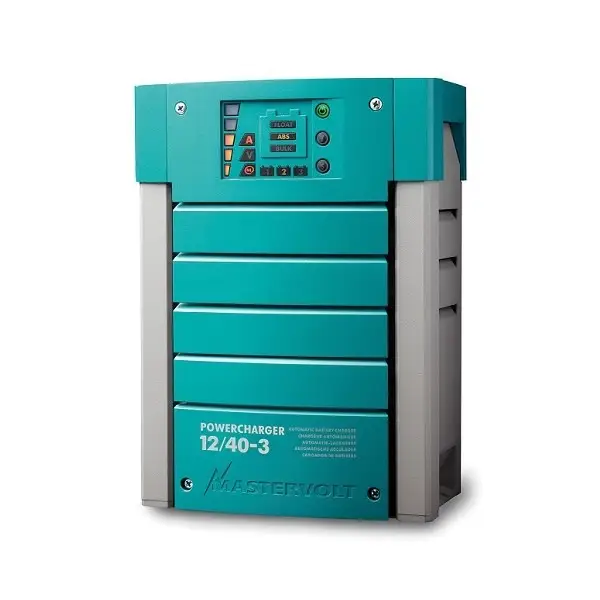
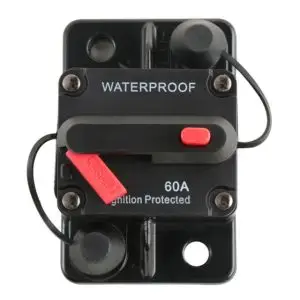
Run the output positive to your battery bank via a 50A circuit breaker. Run the negative through your AC charger, such as the MasterVolt 12/40. If wired up correctly, the amps are counted on your shunt. Your solar controller has a temperature input more often than not. Connect the temperature lead directly to the negative terminal of your battery. The lead may have to be purchased as an accessory.
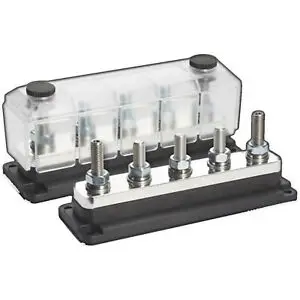
Use busbars to control the wiring. Again, use the appropriate gauge wire with quality connectors. Remember, your system is only as good as your weakest component.
Unlike many other brands, the Victron solar controllers have generously sized input, so connecting large gauge wire is no issue.
Solar cables are designed to be UV and weather-resistant. Under normal circumstances, a ten-gauge wire is sufficient, but particular calculations may be required to determine the gauge for larger arrays.
The wire from the solar controller to your battery may have a larger gauge to reduce loss and should incorporate a mechanical breaker.
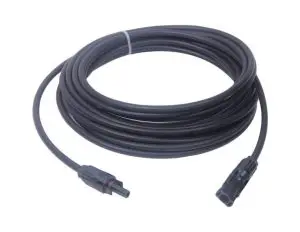
Accessing your data
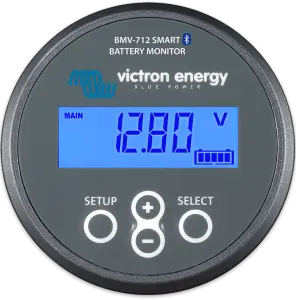
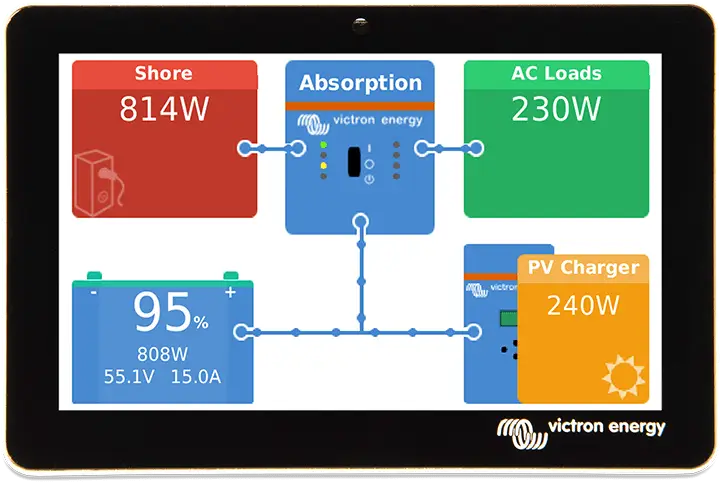
Now we are getting to the heart of things: gadgets… but not just toys. These Smart Displays will help you understand your system and can also be used for configuration, i.e., two-way communications. They warn you when your batteries are running close to their minimum percentage.
Displaying your data
GX Touch 50
If you want to go a bit more fancy, the GX Touch 50 is the display accessory for the Cerbo GX. The five-inch touchscreen display gives an instant overview of your system and allows you to adjust settings in the blink of an eye. Simply connect to the Cerbo GX with one cable. Its super slim waterproof design, top-mountable setup, and simple installation give you a lot of flexibility when creating a crisp and clean dashboard.
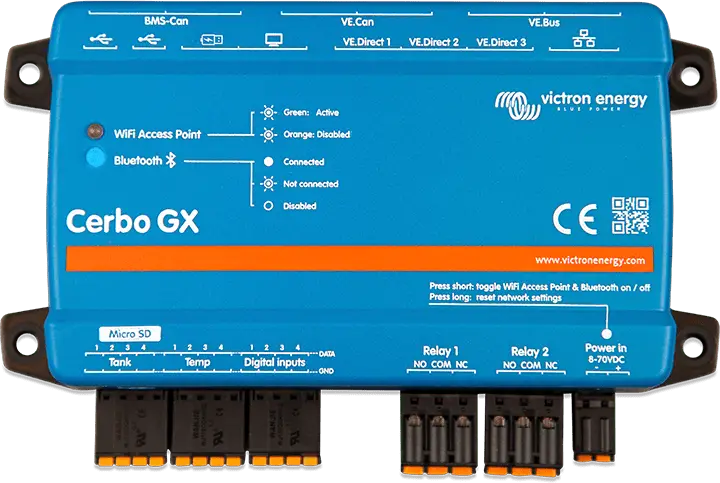
Cerbo GX
Fancier still, this all-new communication centre allows you to always have perfect control over your system from wherever you are and maximises its performance. Simply connect through the Victron Remote Management (VRM) portal or directly access the separate GX Touch 50, an MFD, or the VictronConnect app, thanks to its added Bluetooth capability. This latest addition to the GX range combines all the best of connectivity, redefining innovative power solutions in every way.
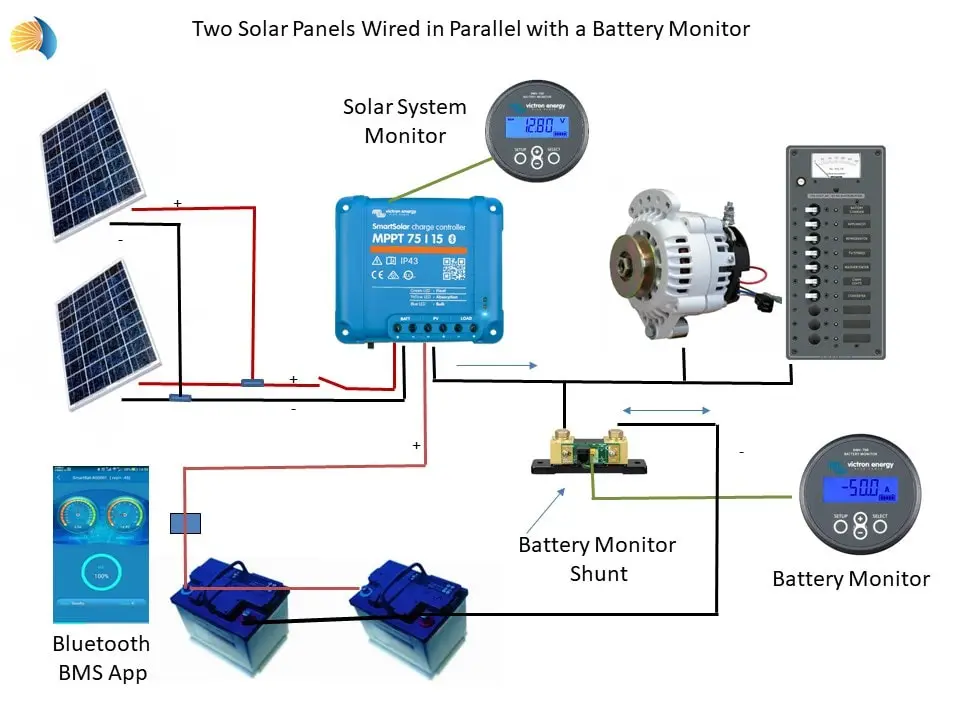
Putting it together
Disclaimer
I have no affiliation with Victron but found their products consistently better than the competition. The service is also extremely helpful and friendly. I recommend Victron because it will save you money.
Author
-

Rene is a keelboat instructor and sailing coach in the Mandurah area WA. He is also the author of several books about sailing including "The Book of Maritime Idioms" and "Renaming your boat".
View all posts


5 thoughts on “Solar panels on a boat: is Victron worth it?”
Thank you for a great write-up on solar!
Thanks Charles, I appreciate your comment…
For better efficiency you should wire the panels in series IF the panels have bypass diodes.
Most moderns panels do have bypass diodes.
Many modern panels have several diodes to bypass sections of the panel if it will be a shadow.
In series the voltage will be higher and that give less loss in cables (it is more easy to transport voltage over amps) and you can have longer cables and less amount of cables are needed in the setup. less point of failures as well.
You get can harvest sunpower for a longer duration when panels are in series because the voltage will go high much easier then in a parallel wired system, better effect in cloudy days.
If you look at the MPPT victron chargers they don’t handle very big cables and I say it because today series is the way to go with panels.
Thank you for a well written,(clear concise with a splash of humour ?)
I came across your blog while looking to understand the heat exchange system in my Volvo D2-55B
Of course l then had to read what other gems of information l could learn from.
My very well maintained Ovni 385 came from a Dutch owner, with a Victron Solar controller.
This l have added to, new solar controller with blue tooth, BMV712 x2 and a Cerbo GX to pull it all together for remote monitoring.
Could l ask you to check your final ‘putting it all together diagram’
It seems that your solar panels are connected to the batt connections and the PV connections wired to the alternator and boats batteries, on your Solar controller.
Many thanks for sharing your experiences.
May l wish you a Very Happy and Healthy New Year.
Regards
John
Great blog! It’s fascinating to see how solar panels have become a game-changer for boats, offering both eco-friendly energy solutions and greater independence on the water. I appreciate the detailed breakdown of Victron products and their benefits for marine applications.
It’s reassuring to know that Victron’s systems can handle the unique challenges of boating, like fluctuating energy demands and space constraints. The ability to monitor and manage power so effectively is a big plus for those planning extended trips.